How to Install a Ductless Mini Split
Please Note: This is a simple overview of the process, for a more detailed guide please refer to the Innovair Installation Manual.
Thousands of homeowners each year decide that they are up for the challenge of installing their own air conditioning systems and when it comes to ductless mini split systems the installation is straightforward and simple. The one part of this process we do not advise you to do yourself is the electric wiring as it can be extremely dangerous if not done properly, for this portion a licensed electrician is required. So if you’re ready to embrace the DIY and install your ductless mini split system yourself, here’s a step-by-step guide on the process:
Tools needed:
- Hammer
- Electric Drill
- Hole Saw Attachment
- Allen Wrench Set
- Stud Finder
- Level
- PVC Tape
- Adjustable Wrench
- Torque Wrench
- Philips Screwdriver
- Vacuum Pump & r410 Refrigerant Gauges
#1 – Choose the right unit
Here at PowerSave AC we’ve made choosing the right mini split unit easy! We have created an easy to use product selector that asks a few simple questions and then shows you the perfect units for your needs. Click here to see it in action.
#2 – Choose a location for your indoor unit and mount the wall plate
Use a stud finder to locate the studs in your internal space so that you can mount the indoor air handler that comes with the unit (this process is repeated depending on how many indoor air handlers you need for your project).
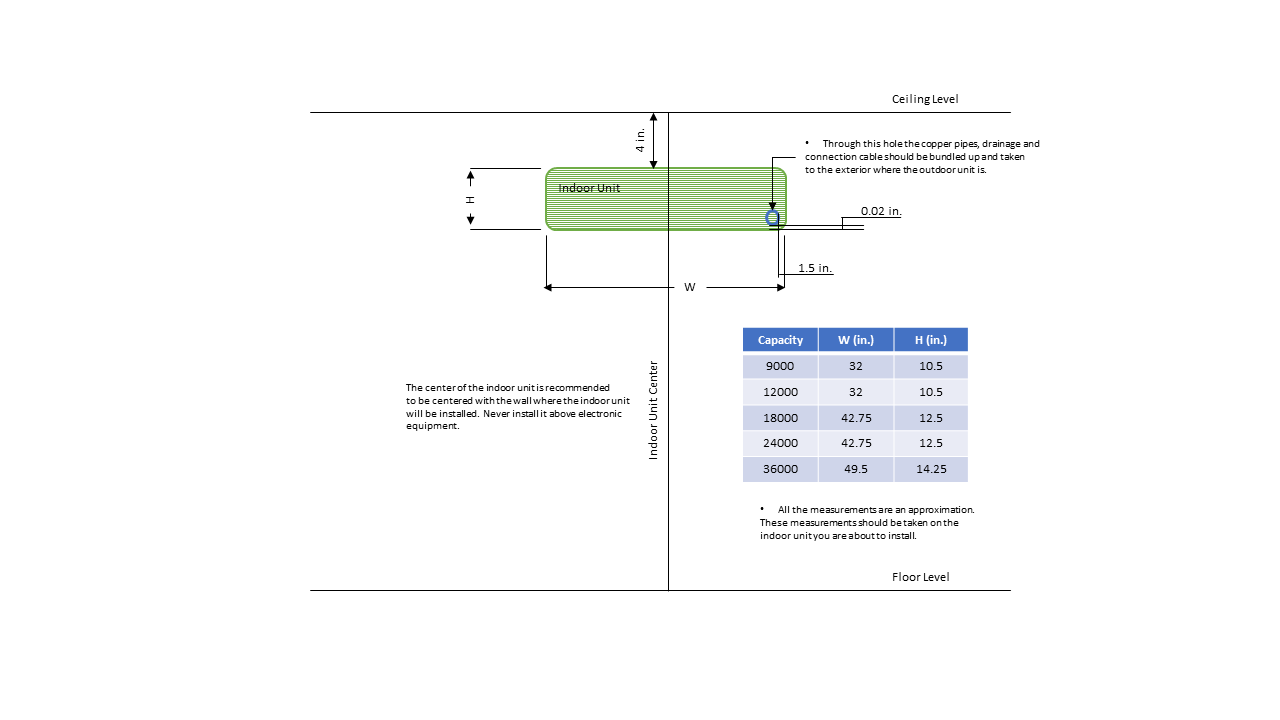
Once you find the studs you can drill in the mounting wall plate for the indoor air handler and line it up evenly using a level to ensure it will be mounted properly. Then pre-drill the holes exactly where they are needed for the mount and hammer in the wall anchors which will hold the screws firmly in place. Once the wall anchors are flush then re-mount the wall plate and screw it in place.
#3 – Open the wall to connect the indoor and outdoor units
Once you have mounted the wall plate properly you'll need to open up the wall (both inside and out) to fit the hose that will connect to the outdoor inverter. The best tool for this job is a hole saw and depending on the width of the hose you'll need the correct hole saw size to connect to your drill (this depends on the unit and is a minimum of 2.5" in diameter and should be placed at a slightly lower angle for better drainage). Once you have fitted the hole for the piping both inside and outside of the home you'll need to insert protective wall cuff (which can also be cut and adjusted depending on the depth of the inner wall.)
#4 – Prepare the refrigerant piping , drainage hose and wiring of the indoor unit (Do not connect the cables to any terminal.) and feed it through the hole. All of these elements should be bundled up.
This is one of the trickiest parts of the process as you have to prepare the piping before feeding it through the wall and once you begin feeding it through the hole you don’t want to kink the hose or bend it in any way to ensure they are connected properly. In order to prepare the piping please follow the steps in the you should follow the steps laid out on page 25 of the Innovair Installation Manual.
Once you have prepared the piping you will choose which direction the piping will leave the unit and remove the “knockout panel” which will open the slot to feed the piping and keep the unit flush against the wall. Next cut the insulating sleeve to reveal about 6” of refrigerant piping. Then determine the angle needed for your piping and grip the refrigerant piping at the base of the bend and begin feeding it through the hole being very careful not to bend or damage the piping whatsoever.
Because the unit will naturally produce condensation, the next step will be to connect the drain hose and feed it through the wall to the outside of the house as well. You will attach the drain hose on the same side as the refrigerant pipe, attach the drain hose extension, wrap connection point in Teflon tape, and wrap the portion of the hose that remains indoors with foam pipe to ensure it is insulated properly. Then remove the air filter and pour a small amount of water to test and ensure the drain hose is working properly.
#5 – Wiring the indoor unit
Warning – Wiring is a dangerous process that should only be done by seasoned professionals and licensed electricians. For this reason we will advise to follow the exact directions found on page 17 of the Innovair Installation Manual
#6 – Finish mounting the indoor unit
Once the indoor wiring is complete you can proceed to mount the indoor unit. Double check that the ends of the refrigerant pipes are sealed properly and be sure to wrap the bundles pipes, drain hose, and signal wire to protect them from the elements. Then hook the indoor unit to the mountain place and ensure it is placed firmly and not moving. The unit should snap into the hooks on the mounting plate. Use a wedge to then prop up the unit and connect the wrapped pipe bundle. Perform a quick leak test and then remove the wedge and ensure the unit is once again sitting firmly on the mounting wall mount.
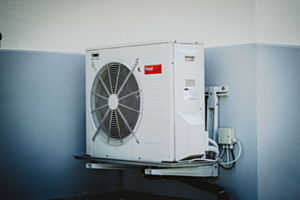
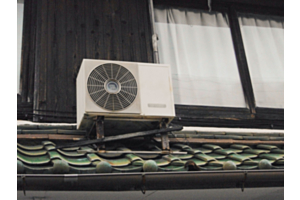
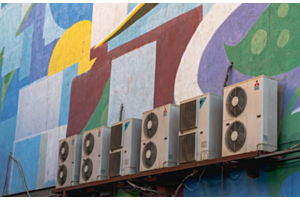
#7 – Install the outdoor unit outside
Firstly ensure that you install the outdoor unit in an ideal location, the location should:
- Meet all spatial requirements in the manual
- Have good air circulation and ventilation
- Be an area where the unit will be firmly held and not be subject to being moved
- Will not be noisy for neighbors
- Be protected from large amounts of rain/sunlight
Once you have confirmed the unit is in an ideal location you may need to fit a rubber seal (more details in the manual). If not, you will insert the drain joint into the hole in the base pan. Then connect the drain hose extension to the drain joint to redirect water during heating mode. Finally, you will anchor the outdoor unit in place either in the ground or to a wall mount (this process will depend heavily on the area you’re installing it in. Please refer to the manual for more details.
#8 – Connect the piping to both units
Nearing the end of our guide is the process of connecting the piping between the outdoor and indoor units. This is done by unscrewing the cover for the packed valve on the outdoor unit, removing the protected caps on the valves, aligning the flared pipe end with each and valve and tightening the flare nuts by hand as tightly as possible/ then using a spanner you will grip the body of the valve and torque the wrench to the correct torque values in the manual. You will then loosen the flaring nut slightly and tighten again. Repeat these steps for the remaining pipe.
#9 – Air Evacuation, Electrical and Gas Leak Checks
The final portion of the installation is the air evacuation and electrical and gas leak checks. These are outlined starting on page 29 of the Innovair Installation Manual and should only be done by a certified professional to ensure the safety and efficiency of the unit. This last portion cannot be skipped!