Can You Install a Mini Split Yourself?

You know you want a ductless mini split system this summer, and the sooner, the better. That has you wondering, would it be a good idea to install a ductless mini split yourself? Is it even possible? If so, how would you do it?
While you can install a ductless mini split with some knowhow and dedication, many experts agree it’s far from easy. If this will be your first project of the sort, then we recommend you leave it to the dedicated and trained pros to take care of installation.
If you insist on going forward with the installation yourself, you’ll need these tools:
- Power drill
- Hand saw
- Hammer
- Chisel
- Adjustable wrench
- Torque wrench
- Electrical tape
- Philip head screwdriver
- Ductless mini splits
- Wood screws
- Level
- Drywall and hollow anchors
First thing’s first, and that’s selecting your mini split. Once you do that, you need to get the indoor unit installed. Here are the steps to follow for this.
Step 1: Determine where your mini split will go on your wall. The wall should be free of any obstructions.
Step 2: Use your level to ascertain that your mini split bracket is in alignment.
Step 3: Mark on the wall where you need to drill your brackets. Then make your holes.
Step 4: Attach the bracket with self-tapping anchors and screws.
Step 5: You need to take the copper lines, the drain, and the communication wires all together towards the outdoor unit. So, if your outdoor unit is right behind the wall where the indoor unit is located; you would need to open a hole to go through the wall all the way to the exterior part of your home, the hole will be beside the mounting bracket on the bottom corner and it will be about three inches wide. This is where your refrigerant lines will go, which many DIYers agree is one of the hardest parts about installing your own ductless mini split. You will also send control wires and drain tubing through this hole. Thus, the hole should have a slight downward angle.
Step 6: Attach your indoor ductless mini split to your control wire, typically by taking the back plate off and linking the control wire.
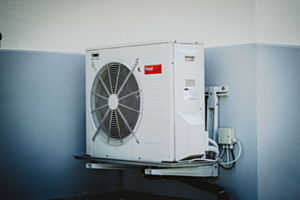
Once you complete that job, your work isn’t done yet. Next, you have to get the outdoor mini split unit set up. Here’s what you need to do.
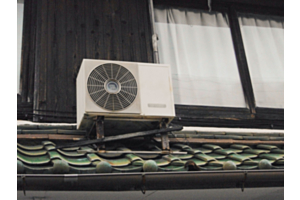
Step 1: Again, begin by finding the right spot for your outdoor mini split unit. You can set up a pad for the unit to sit on or even put it on your roof if you can’t find a suitable location around the yard.
Step 2: Take all the tubing you fed through the hole above, make an exit point, and attach the tubes to your outdoor unit. How you do this step varies depending on your mini split model.
Step 3: The wires should end at an exterior wall so they can’t move nor come loose. Wire covers are a good idea here as well.
Step 4: The line set’s joint pipe must now connect to the unit, as should the multi-conductor wiring, so have your torque wrench handy.
Yes, those were a lot of steps, and as you can see, this job will be anything but fast and simple. If you’d rather trust in the professionals, reach out to our team at PowerSave AC. We’re ductless mini split specialists who will take care of the installation work so you don’t have to!
Sources:
https://www.homedepot.com/c/ah/how-to-install-mini-splits/9ba683603be9fa5395fab90c887a9dd